Configure Windows Update for Business (WUfB) with Microsoft Intune (Now with Windows Hotpatching!)
- aymeneljaziri
- 28 juin 2025
- 4 min de lecture
Dernière mise à jour : 3 juil. 2025
Keeping Windows devices up to date is essential for both security and operational stability. With Windows Update for Business (WUfB), organizations can leverage cloud-native update management without relying on WSUS infrastructure.
In this guide, I’ll walk you through how to configure and deploy WUfB using Microsoft Intune, step by step. The latest addition? The powerful Windows Hotpatching capability now available for eligible devices to reduce downtime even further.
Prerequisites
Before getting started, ensure:
You have a valid Microsoft Intune license.
Devices are running Windows 10/11 Pro, Enterprise, or Education.
Devices are enrolled in Intune and Azure AD joined or hybrid-joined.
For Hotpatching, specifically :
Requirement | Details |
Licensing | One of the following: ✅ Microsoft 365 E3 / E5 ✅ Microsoft 365 Business Premium |
OS Version | Windows 11 Enterprise or Windows Server 2022 Azure Edition |
Deployment | Devices must be cloud-hosted (Azure VM, Windows 365, or Azure Stack HCI) |
Autopatch | Devices must be enrolled in Windows Autopatch (configured via Intune) |
Hotpatch compatibility | Confirmed via the device being in a supported ring and flagged as eligible for hotpatching |
Step 1 – Create a Windows Update Ring in Intune
In Microsoft Intune, update rings profile is used to manage how and when Windows updates are deployed on Windows 10 and Windows 11 devices.
Here are some key points:
Deploy updates : You can specify which feature and quality updates to install on devices, ensuring they are always up to date.
Update control : Update rings let you control when updates are installed, which can help minimize interruptions for users.
Upgrade to Windows 11 : You can use Update Rings to upgrade eligible Windows 10 devices to Windows 11.
In summary, Update Rings in Intune are a powerful tool for ensuring that your Windows devices remain secure and up-to-date with the latest features and patches.
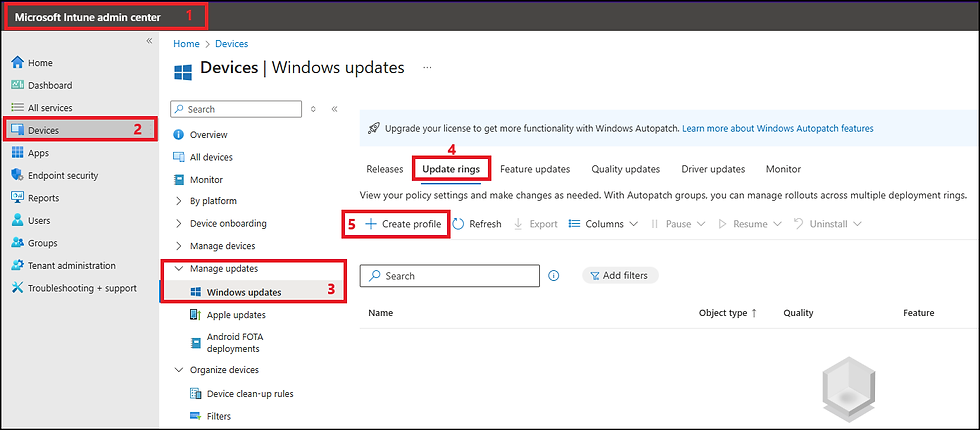
Go to the Intune Admin Center.
Go to Devices -> Manage Updates -> Windows updates -> Update rings for Windows 10 and later -> Create Profile.
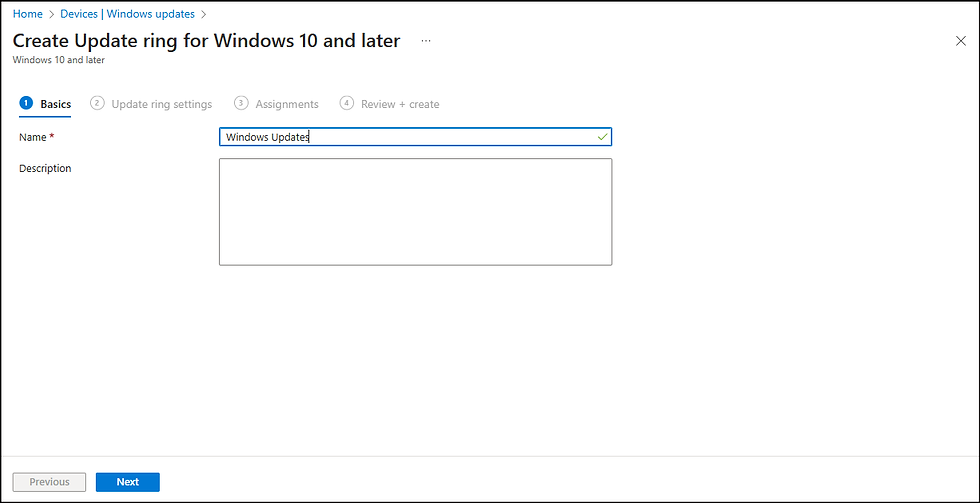
Choose a meaningful name.
Set parameters such as deferral time and reboot management.
In my case I have specified that differal Feature updates and quality updates should be waiting 15 days to be available for installation, and this to avoid issues that comes with non tested updates but you can set it to 0 in order to install immediatly feature updates if you want.

Add Assignment (Select specific group or All users/ All devices)
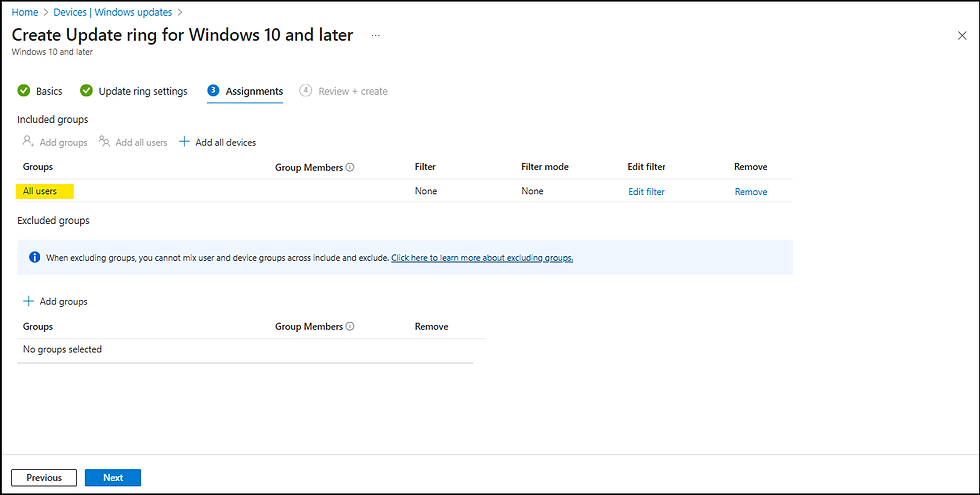
Save and assign the policy to the relevant device groups.

Step 2 – (Optional) Use Feature Update Policies
In Microsoft Intune, Feature Update Profile is used to manage which specific versions of Windows devices should receive.
Here are some key points:
Version selection : You can choose the Windows feature update version you want devices to stay on, such as Windows 11 22H2, 23H2 or 24H2.
Upgrade to Windows 11 : Use this profile to upgrade devices running Windows 10 to Windows 11.
In summary, the feature update profile in Intune allows you to precisely control which versions of Windows are deployed on your devices, ensuring consistent and stable update management.
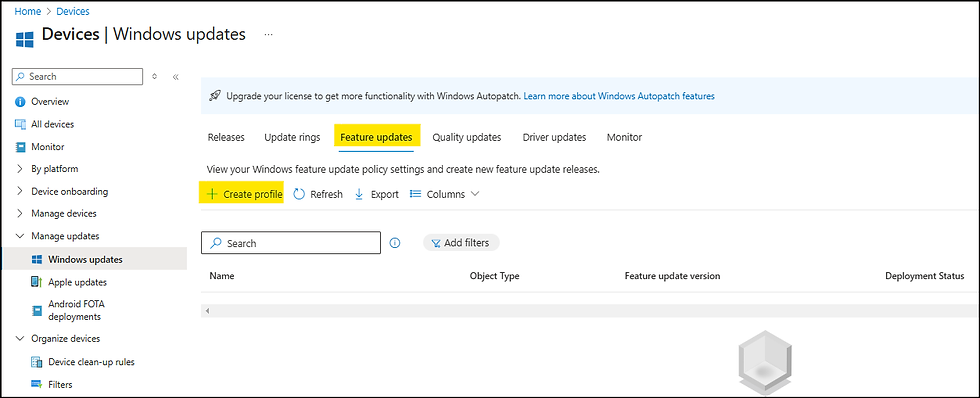
In Windows Update Section, Select "Feature Updates"
Click Create Profile
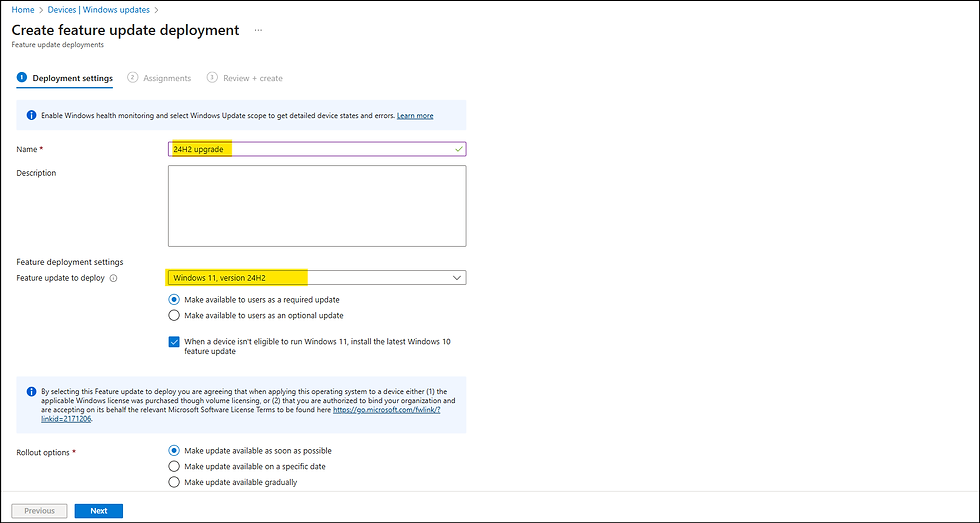
Give a name to your profile and select Windows 11 version 24H2 or other version if you want.
Add group assignment or All users / All devices.

Click Create.

Step 3 – Enable Windows Hotpatching (NEW)
Windows Hotpatching allows security updates to be installed without rebooting, improving uptime ideal for critical systems like Azure VMs and Cloud PCs.
💡 Benefits:
No reboot for most security updates.
Reduced disruption for users and services.
Automatic patching within defined maintenance windows.
How to Enable Hotpatching
Ensure device eligibility:
Must be Azure-hosted (e.g., Azure VM, W365).
Running Windows Server 2022 Datacenter: Azure Edition or Windows 11 Enterprise.
Enrolled in Windows Autopatch.
Enroll Devices in Windows Autopatch:
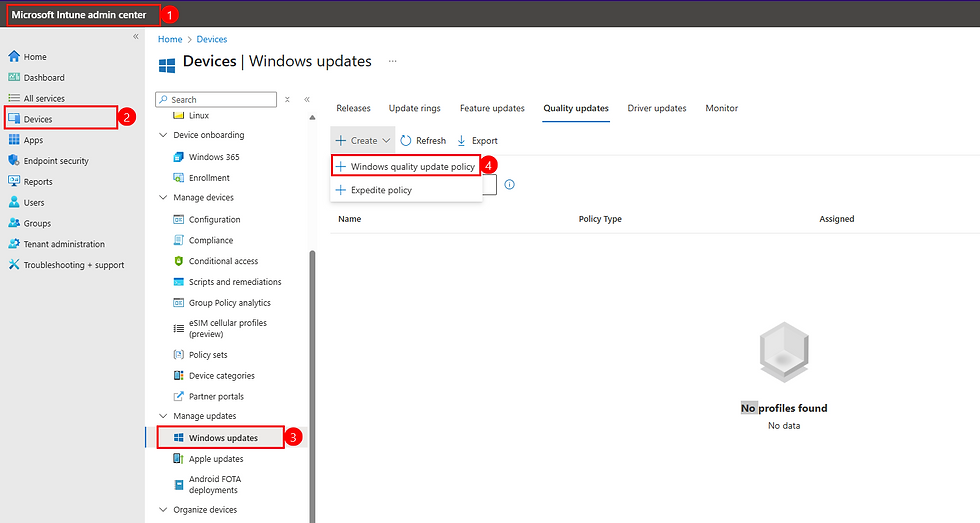
Go to Intune Admin Center > Tenant Administration > Windows Autopatch.
Follow the registration wizard.
Add devices to Autopatch deployment rings (Test, First, Fast, Broad).
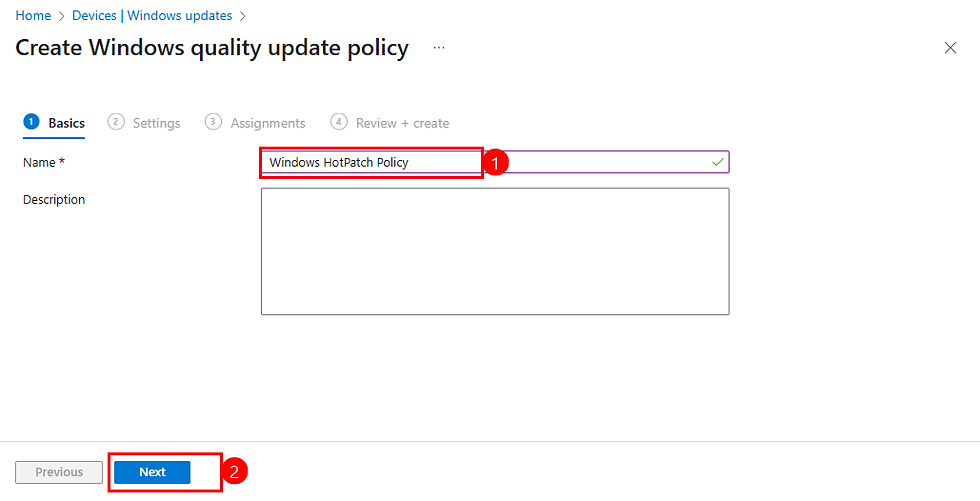
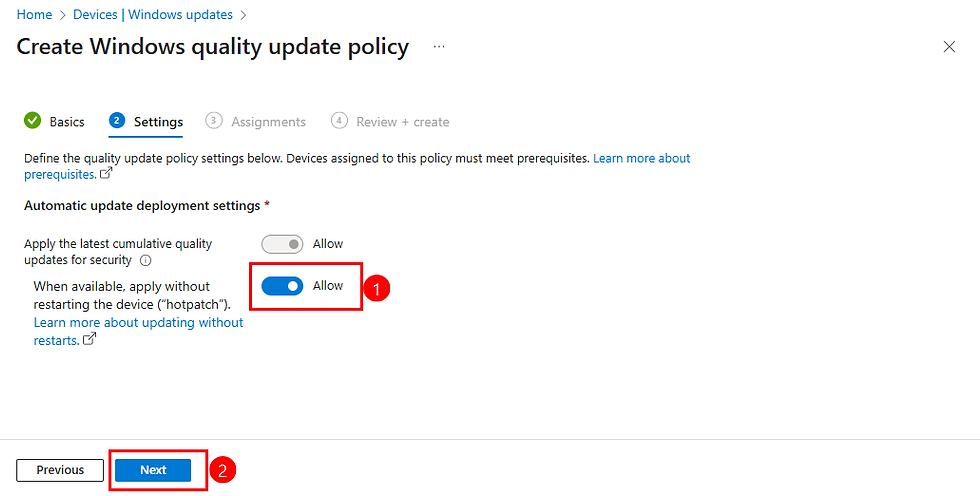
Give a name to your Policy
Select Option "When available, apply without restarting the device (“hotpatch”)"
Clcik Next
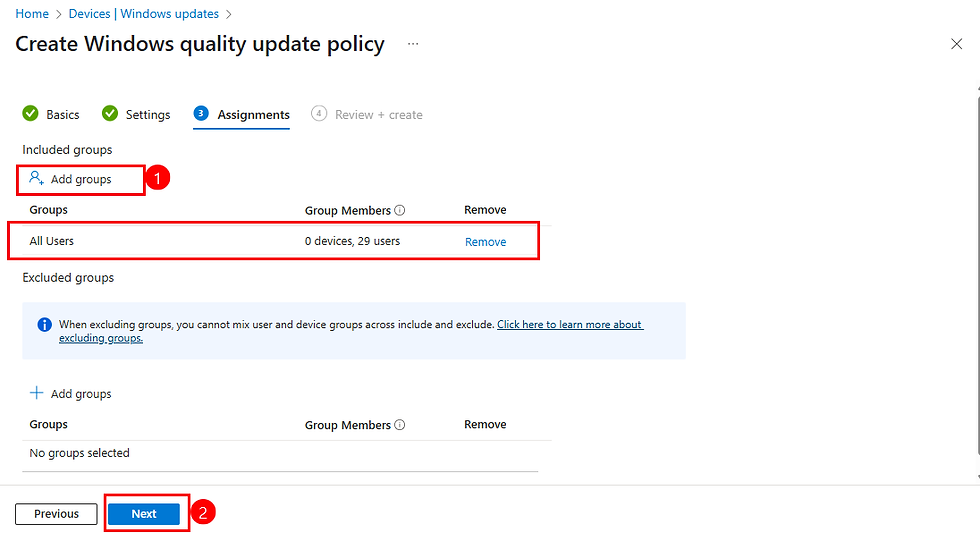
Select group of users then click Next
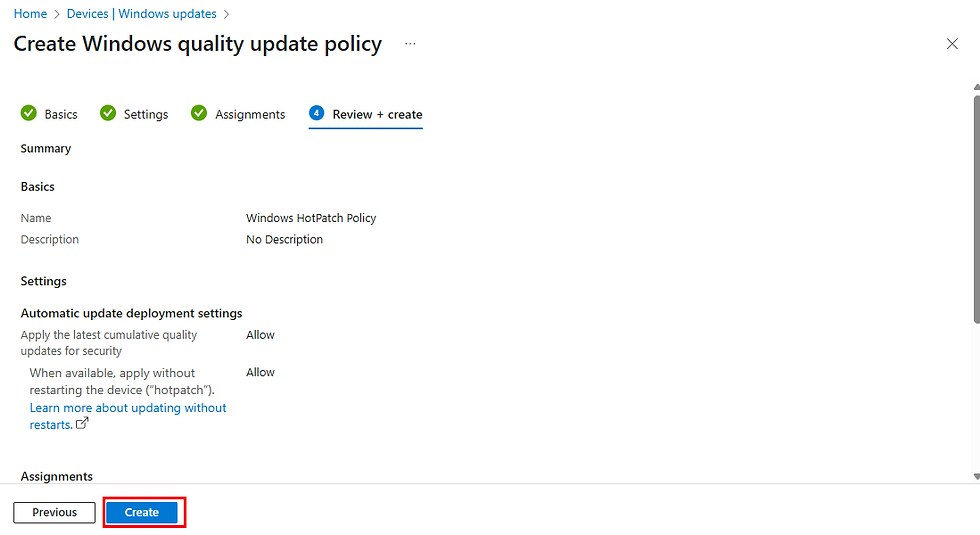
Click Create
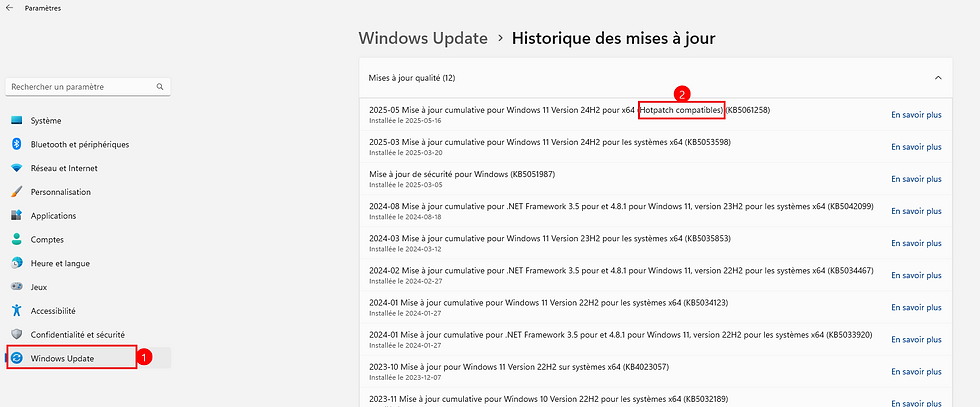
Verify Hotpatching Status :
Open Windows Update settings on a managed device.
You should see "Hotpatching ompatible" if the feature is active.
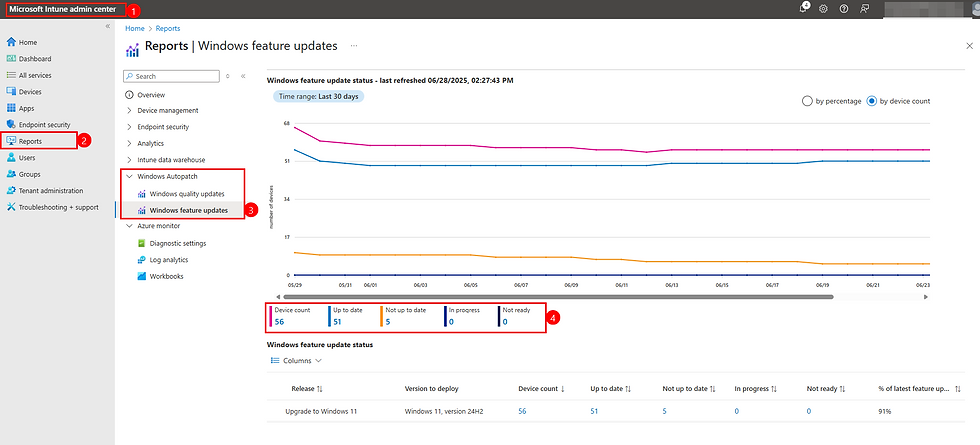
Step 4 – Monitor Update Compliance
After waiting some time for updates to be installed you can check reports on recent policies that we have creted, just Click in your policy and then you'll be able to see some statistic about successfull installation, Errors, Conflits ...etc, for more details just click on "View Report" buton to per device name installation status.
Go to Reports > Windows Updates > Reports.
Navigate between Feature update and Quality Updates to see reports.
Final Thoughts
Combining Windows Update for Business, Feature Update Policies, and now Windows Hotpatching, gives you full-spectrum control over Windows updates from flexible scheduling to near-zero downtime patching for critical systems.
This is modern endpoint management done right.
Thanks
Aymen EL JAZIRI
System Administrator & M365 Specialist


Commentaires